
HOW TO SET UP GOOGLE RECAPTCHA V3 IN CONTACT FORM 7
Table of Contents
ToggleWHAT IS RECACHA?
reCAPTCHA is simply a free service from Google that helps protect websites from spam and abuse. A “CAPTCHA” is a Turing test to tell humans and bots apart.
According to the Google reCAPTCHA website:
reCAPTCHA is a free service that protects your website from spam and abuse. reCAPTCHA uses an advanced risk analysis engine and adaptive challenges to keep automated software from engaging in abusive activities on your site. It does this while letting your valid users pass through with ease.
Steps
1: Head over to Google reCAPTCHA Website
Go to the Google reCAPTCHA website and complete a registration form for our website.
2: Click The Blue “Admin Console” Button In The Top Right Corner.
After logging in, you will find a page that looks like this:

3: Enter The Label To Identify Your Site
The label is simply a way for you to identify this particular site in the future. It is helpful to label this something like the site name or the site domain name.
4: Choose A ReCAPTCHA Type
Here you will get options to select either version 2 or version 3. You can learn more about the difference between v2 and v3 from the Google Developers website.
For this guide, select reCAPTCHA v3.
5: Add Your Domain
Here enter the domain name of the site you want to register.
6: Accept the ReCAPTCHA Terms Of Service
Read and accept the terms of service.
7: Click The Blue “Submit” Button
After submitting the registration form, your site will be registered and you will get the site key and secret key for the site.
ADDING THE SITE KEY AND SECRET KEY TO CONTACT FORM 7 FORM
Move to the WordPress admin screen and open the Contact > Integration menu page.

- You will see a box titled reCAPTCHA there.
- Click Setup Integration in the box.
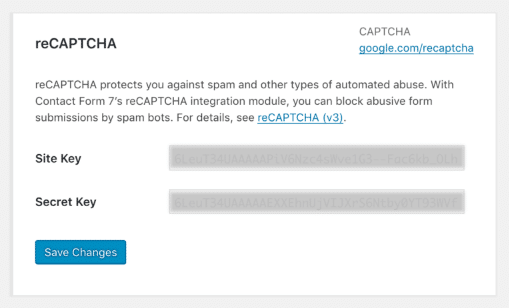
- It will display input fields Site Key and Secret Key.
- Copy-paste the two keys you received in the previous step into the fields, and click Save Changes.

That’s it.

